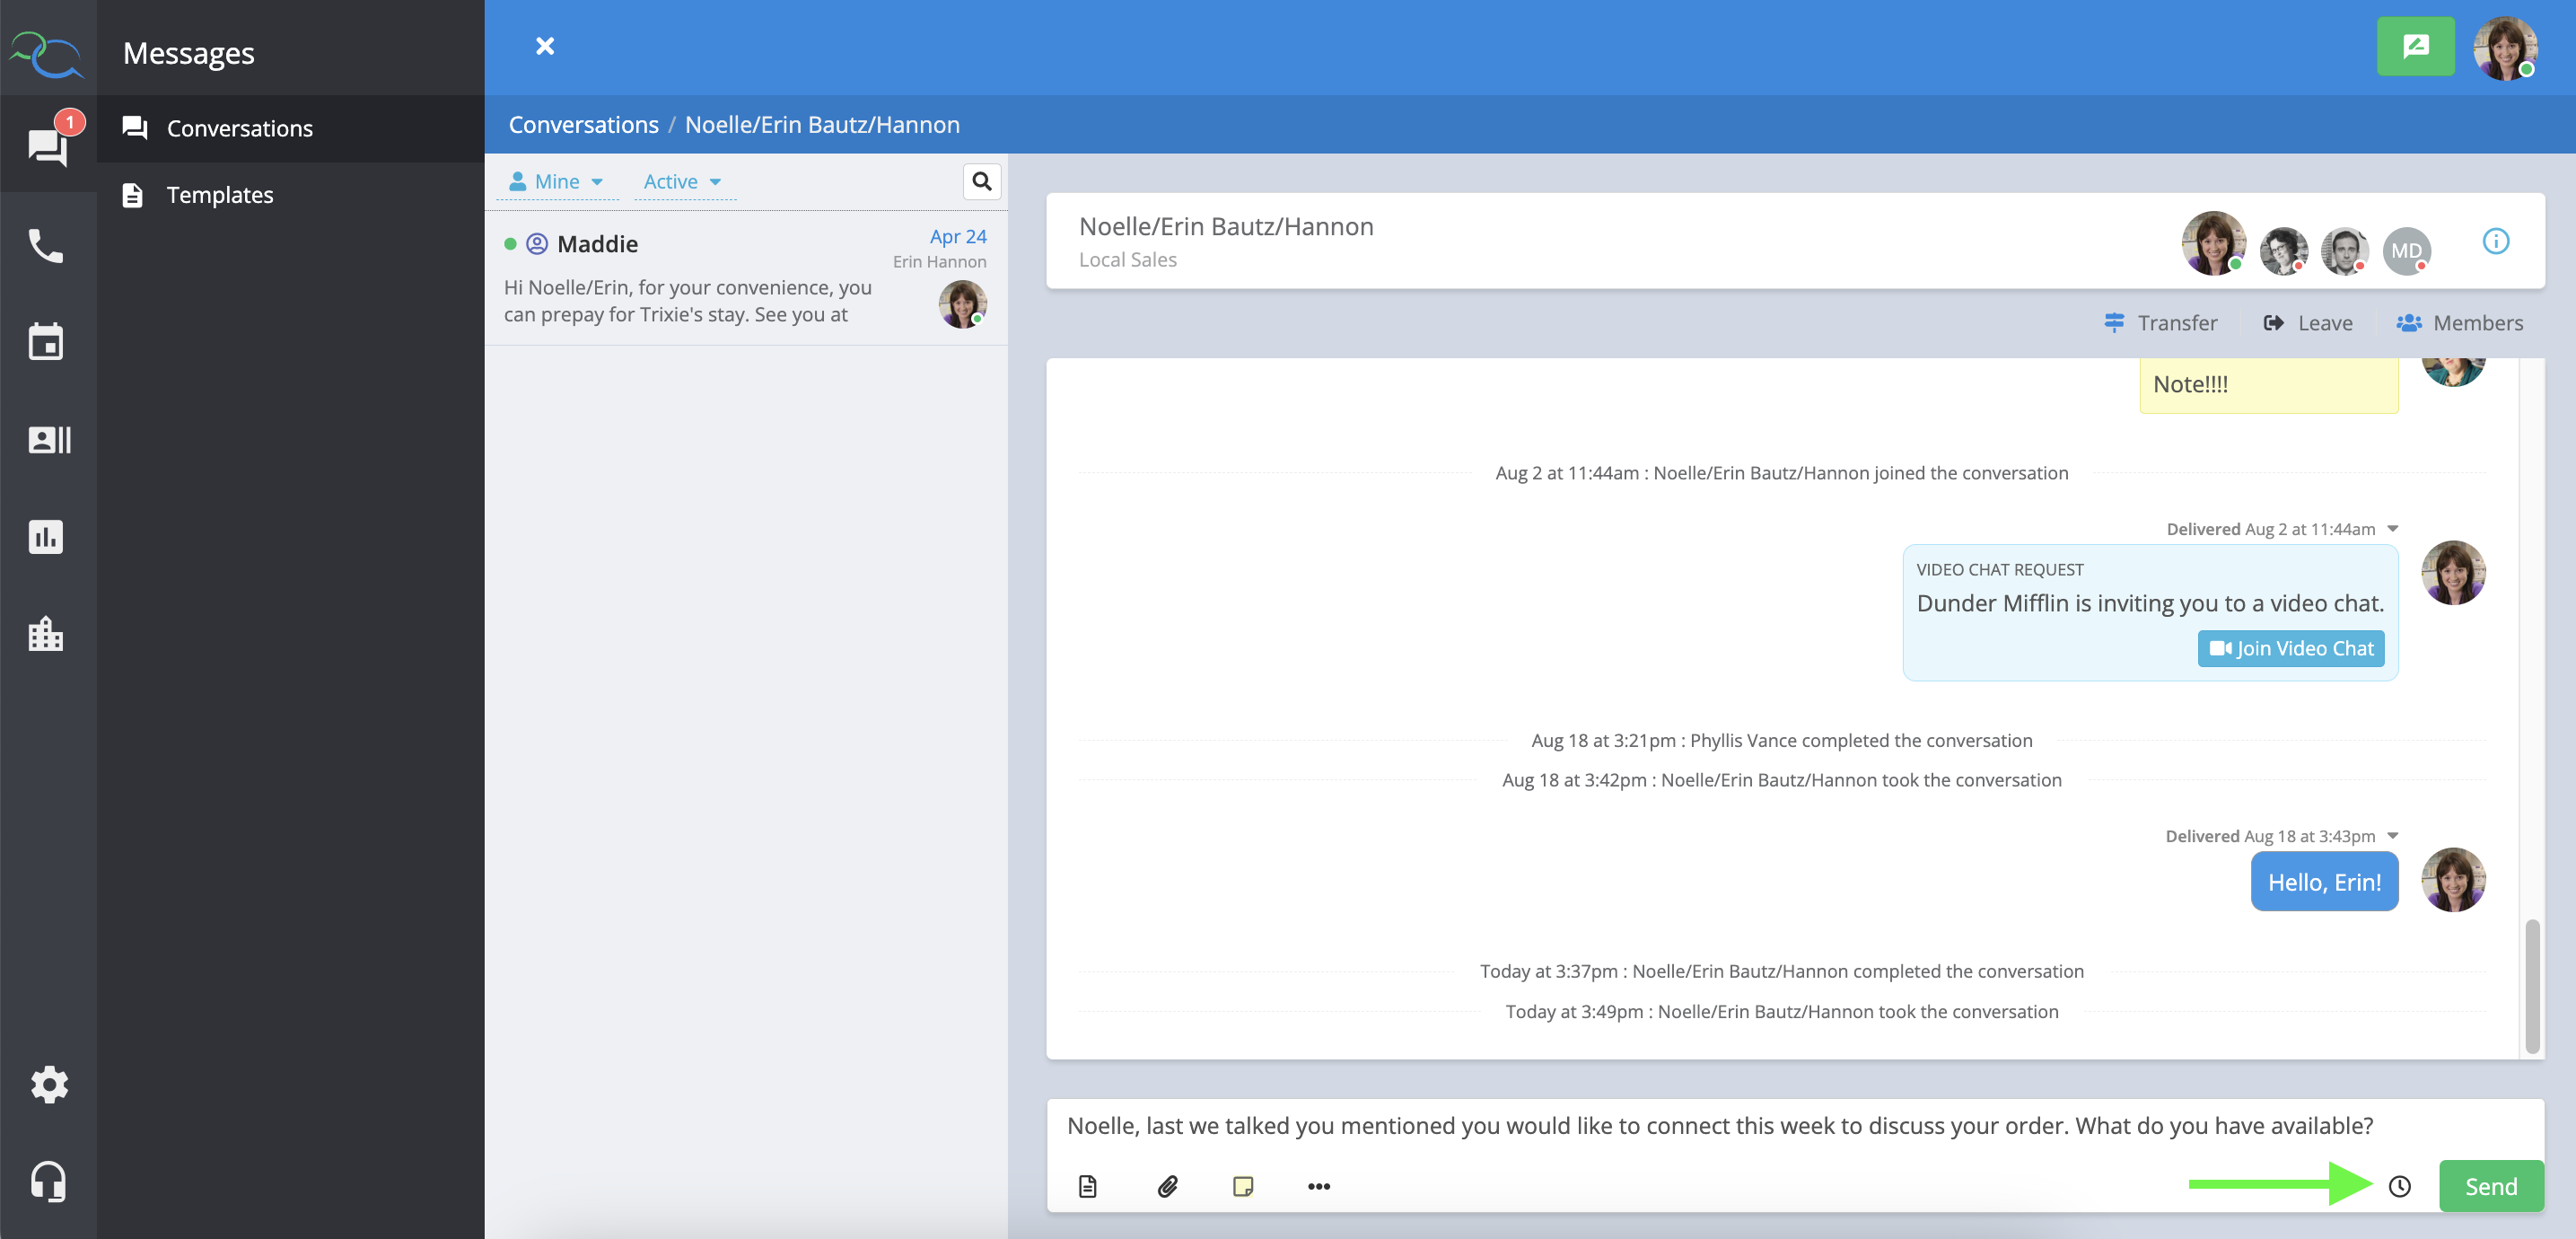
Scheduled messages are great for following up with someone later or reminding someone of an upcoming appointment. You can schedule a message selecting the clock icon to the left of the send button.
You can adjust your message in the message field either before or after you select your send date and time. When you’ve scheduled your desired date and time, select the “Schedule” button.
You can view your scheduled message by selecting “1 scheduled message” within the message thread. This will show you a preview of your scheduled message and allow you to cancel it using the red trash icon.
Any conversation with a scheduled message will have a clock icon next to the date in the conversation preview to indicate that a message is scheduled within the conversation.
You can filter to view only your scheduled messages using the dropdown menu to the left of the search icon in the conversation filters. To view only scheduled messages, select “Scheduled” from the right filter menu.
Once you’ve selected “Scheduled”, only scheduled messages will show in your conversation preview list. Be sure to switch the filter back to “Active” when you are finished.
Questions? You can chat with Captivated Support via the left-hand menu or text Captivated Support at 317.316.3600