Integrating with Captivated will allow users to text message consumers in bulk using the “Send-To Texting” option in reports. Users can also utilize the Captivated Google Chrome extension to send text messages to individual customers and review their conversation history from the Customer Details page within Service Assistant.
Step 1: Copy the API key given in the “Captivated-Getting Started” email or via the Captivated Support message thread.
1A: Once your API key is copied to your clipboard, go to SA5 to save it and complete the integration.
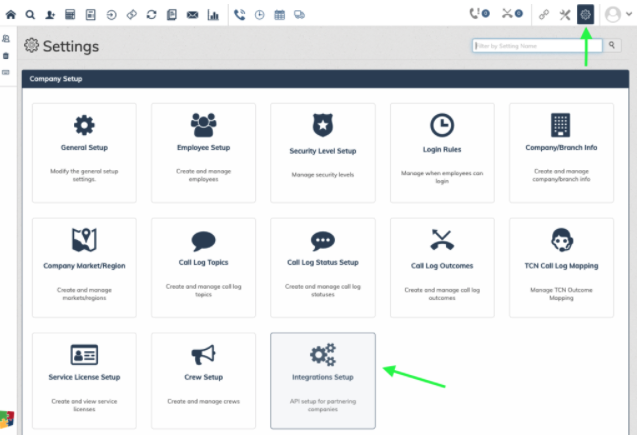
1B: Click on the gear icon and then Integrations Setup.
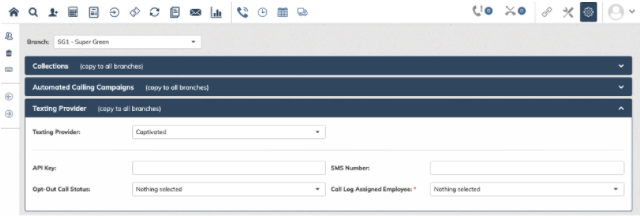
1E: Click on the drop-down carrot next to Texting Provider.
Integrations will need to be turned on in Employee Security for access to edit. These settings can be configured once per branch or copied to all branches the user has access to by using the "copy to all branches option".
1F: Paste the API key into API key field.
1G: Input the SMS Number that consumers will receive the text message from. This should mirror what is set up in Captivated. IMPORTANT: Input the 10 digit SMS number with digits only. Do not include periods, dashes or parentheses. i.e. 1112223333
1H: Opt-Out Call Status: These parameters will be used when creating a call log entry for failed messages. This includes opt-outs, bad phone numbers, templates not assigned to the customer’s branch, or there is no API key available.
1I: Call Log Assigned Employee: Choose the employee that you would like the call log to be assigned to. Messages that fail to send or are returned will also create a call log entry assigned to an employee and call log status of your choosing.
Step 2: Creating message templates.
The report send-to option will allow users to select a template they have created to be included as the body of the text message. Users can append these templated messages prior to sending.
Templates must be created within SA5 before you can use the "Send-To Texting" action from reports.
Templates in SA5 are completely separate from templates within Captivated.
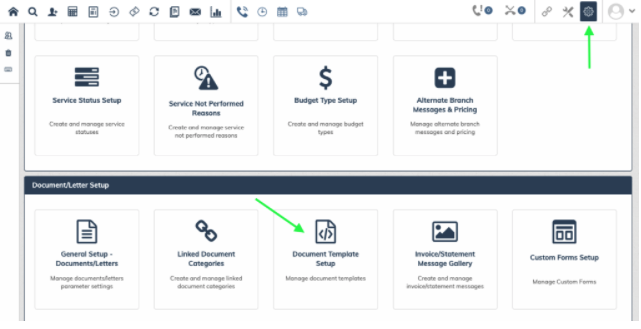
2A: Click on the gear icon and then Document Template Setup.
Note: You can check or uncheck Show System Templates to see what has already been created.
2B: To create a new texting template hit the plus icon.
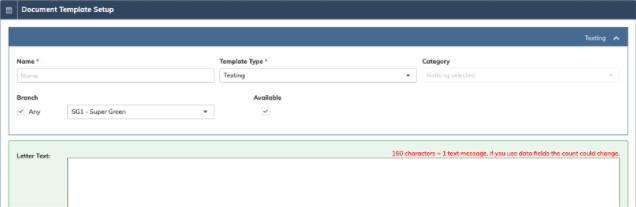
2C: Input a name for your template
2D: Click on the drop-down arrow under Template Type to select “Texting”.
2E: Compose your message. Use this segment calculator to confirm your character count.
Please note: 160 characters = 1 text message. If you use data fields, the count could change. Keep in mind, that if you use include an emoji, the character count drops down to 80.
2F: To use data fields, click on the 3-bullet list. Drag and drop into the Letter Text box.
Step 3: Bulk Message/Text Aheads
Once a bulk message is sent, it cannot be unsent. Please double check your customers on the reports as well as your template for typos BEFORE sending to texting.
There are multiple reports you can "Send-To-Texting" from SA5. Anywhere you see the "Action" button in the left-hand menu that offers the "Send-To-Texting" target means you can send through Captivated.
This feature will only text customers with a text or cell phone number on their customer record. Only one message will be sent if the user has both and the text number is priority.
Texting using Captivated is completely independent of AMA Before Service Texts. The Company Setup parameter page has an SMS Number which has been relabeled “AMA SMS Number”. In a subsequent Service Assistant update, the “Text Prenotify” contact preference will be relabeled as “AMA Text Prenotify”. The new “Don’t Text” contact preference will not be impacted by AMA.
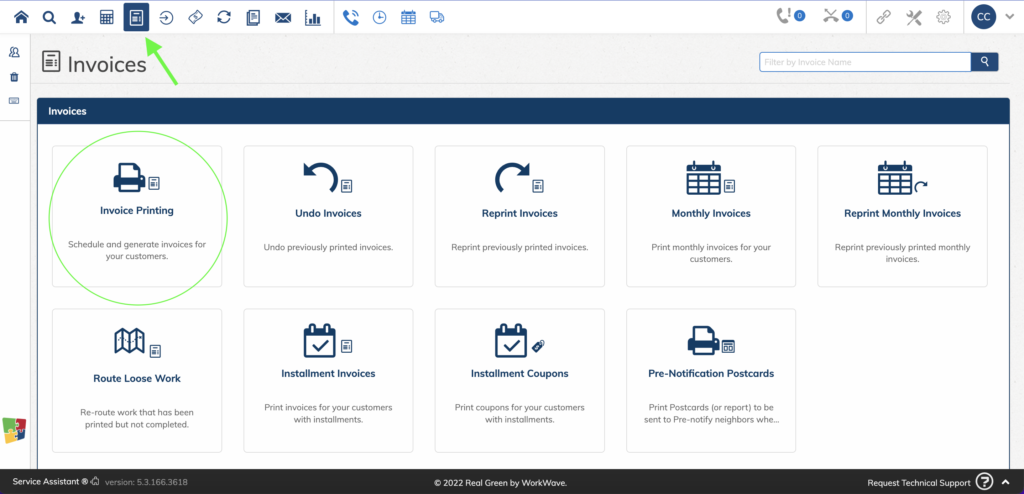
3A: Click on the reports icon. Choose “Unpaid Invoices”, “Unserviced List”, “Credit Hold”, “Route Loose Work”, “Customer List”, “Invoice Printing”, “Aging Report” and so much more. Pull the report as normal.
WARNING: If you click the "Send to Texting" button (next to the "Preview" button) on the bottom of the page, it will automatically send the most recent template that was used.
3B: The most popular way to bulk send text aheads is through Invoice Printing.
Add to search
Route using “Go to Map” or hit “Next” to see a list.
Use “actions” button on left-hand menu to send to texting from Step 2. This is before you generate/print invoices in step 3.
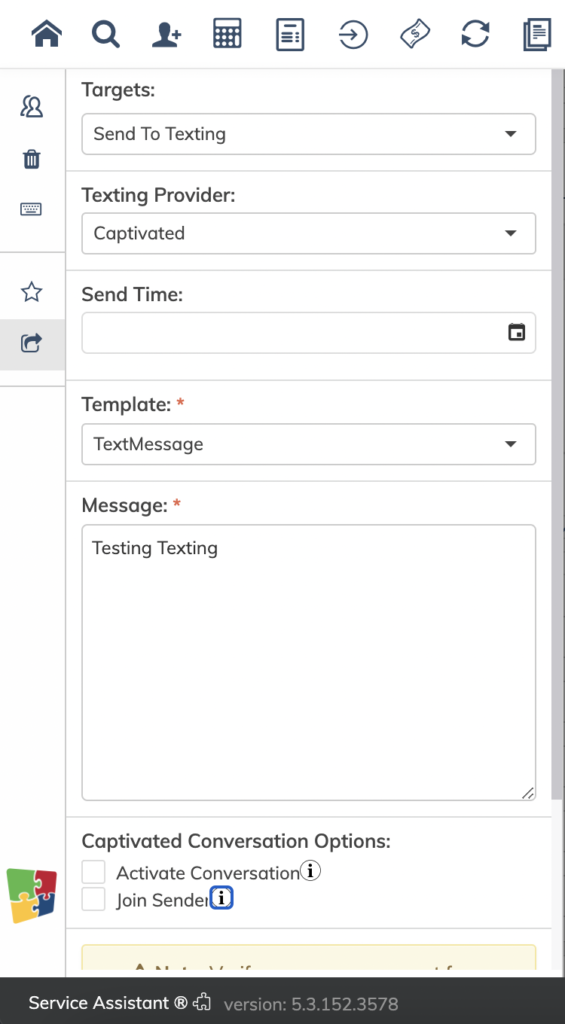
3C: Click on the actions button (square with right facing arrow) and then click on the drop down under “Targets” and choose “Send to Texting”.
3C: Choose your template, send time (not recommended as each message will come in as a new queued message at the date and time you select), uncheck the Captivated Conversation options and hit send.
Please read Captivated Conversation Options carefully. We recommend to leave both of those options UNCHECKED for the best experience.
If left checked, messages will come into Captivated as a new queued message.
Once sent, you will receive a pop-up window that indicates a successful send count and an unsuccessful send count.
If there are any that are unsuccessful, head to the Call Log to see which customer did not receive the message and the reason. Common reasons that a message would be unsuccessful: opt-outs, bad phone numbers, templates not assigned to the customer’s branch, or there is no API key available. An unsuccessful message means it did not come into Captivated.
To confirm/review messages, head to Captivated and toggle your filters from "mine" and "active" to "everyone" and "all".
Other helpful texting tips regarding Opt-Outs
To prevent customers that have opted-out from receiving a text message, click the plus icon next to “Advanced Options” and then click the drop-down carrot next to preferences. Choose “allowed”.
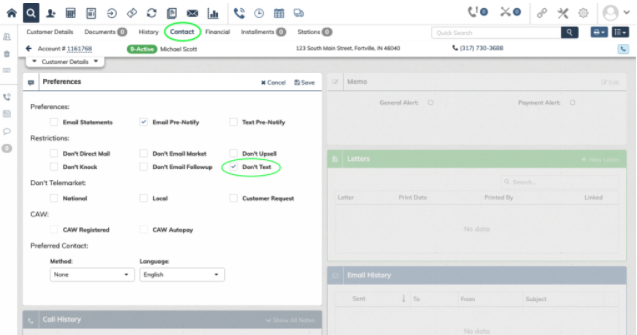
Note: If a customer replies with “STOP” to opt out of texting, the “Don’t Text” checkbox will automatically be checked in the customer record under “Contact” > “Preferences” preventing a message from being sent from a report.
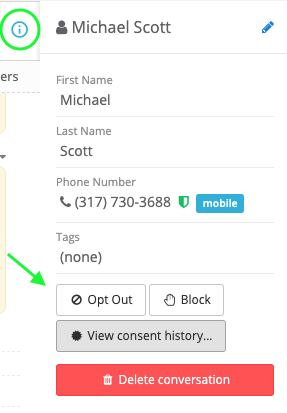
Also note: If a SA5 user, checks the “Don’t Text” contact preference in the Customer Details page, it will NOT be honored by the Captivated browser extension. The user would need to opt out of messaging in Captivated for that customer. To do this in Captivated, click on the information icon and then choose “Opt Out”.
Step 4: Sending Single Messages via Captivated browser extension
4C: Click on Captivated browser extension when on Customer Details page.
4D: Click the green new message button to the right of the name.
The browser extension will look at all 6 numbers in the customer's account and match them with previous numbers that were texted. If the customer has opted out from Captivated, they will not be able to be texted until they text the company back.
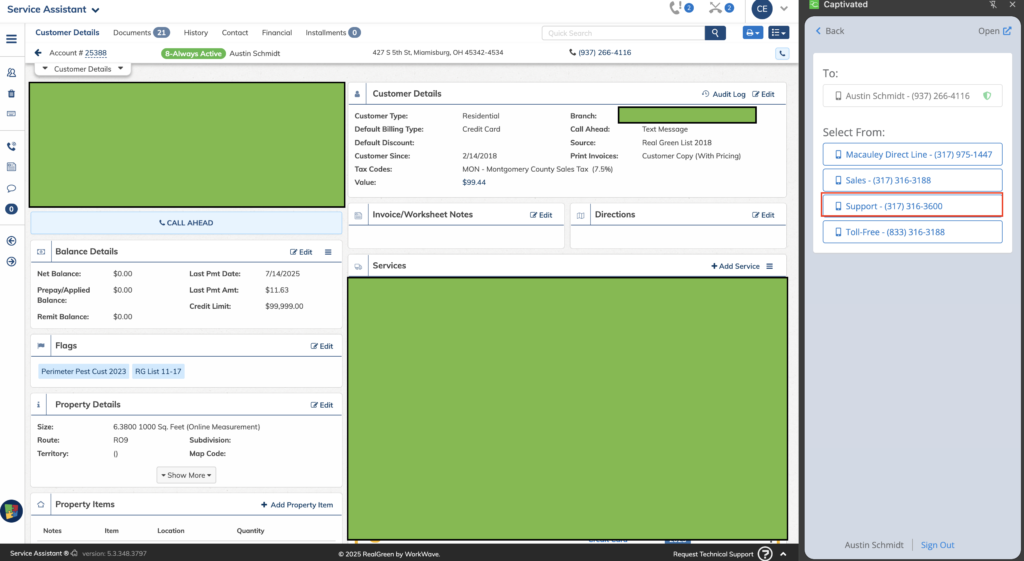
4E: Choose channel to send from
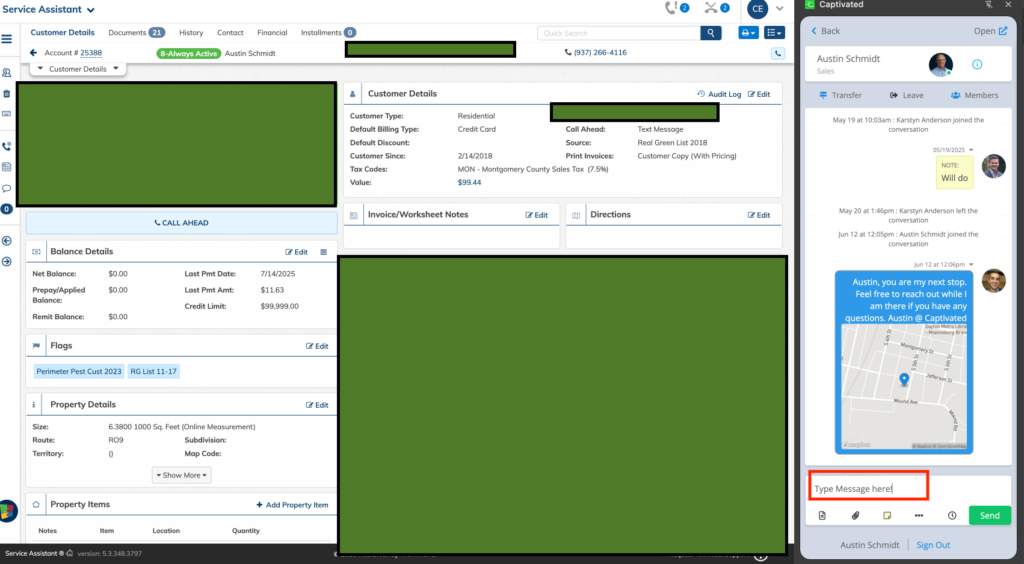
4F: Compose message and hit send!
Note: View conversation history by clicking on the contact card next to the text bubbles.
Questions? You can chat with Captivated’s support team using the “Support” option in the left-hand menu of our app or text Captivated Support at 317-316-3600.