There are two ways that an appointment can be rescheduled:
1) You can choose the date and time that the customer wants to reschedule to on their behalf
2) You can send the customer a link so they can choose a date and time that works best for them at their convenience.
First, scroll upwards within the thread to find the blue appointment booked box. Then select the “reschedule” button in blue.
If you know the date and time the customer wants to reschedule, hit the “Reschedule” button in the blue appointment booked box and then hit “Select a new appointment time.”
It will open a new tab to your booking site where you can then choose the date and time that the customer would like to reschedule to.
Once you have submitted the new date and time, the workflow stage in Captivated will move to “rescheduled” in purple and the customer will receive a text message confirming the new date and time.
Captivated will move the event on your connected Google or Outlook calendar to the new date and time. No manual work required.
If the customer is unsure when they want to reschedule for, hit the “Reschedule” button in the appointment booked stamp and then choose “Send a reschedule link”.
A reschedule template will populate in the ‘write a message’ field. Go ahead and hit “send”.
It will then send a reschedule booking request with a link for them to book at their convenience. This will move the workflow stage to “Reschedule Requested” and will automatically cancel the original appointment.
If the customer does not book within two days of receiving the reschedule booking request, a reminder to book will be sent.
If the customer does not book within seven days, the workflow stage in Captivated will move to “Final Reach Out”. At that point, no automated messages will send.
If you’d like to send another request to book, you can do so manually or hit the three dots and hit “request appointment”.
If a customer doesn’t have a smartphone or has requested you assist them in booking the appointment, scan your QR code and fill out the information on the form on behalf of the customer to start the booking process.
The form looks like the below photo and it is important that every customer has this completed to capture their delivery date. This ensures that the customer cannot book outside of their eligibility window.
If a customer wishes to cancel their appointment, navigate to the blue appointment booked box and click the red “Cancel” button.
Once you’ve clicked on “Cancel this appointment” the workflow stage will change to “Canceled” and a confirmation text will be sent to the customer confirming their appointment cancelation.
In the canceled workflow state, no automated reminders go out.
If you’d like to send a new request, simply hit the three dots and hit “request appointment”.
If you are out of the office for vacation or have a personal or work appointments when you normally schedule Love-Encore appointments, block out your time on your Google or Outlook calendar.
It is imperative that the event is marked as “busy” instead of “free”. Our booking site will not recognize an event if it is marked as “free”.
Outlook’s user interface can be tricky as I have seen it change it to “free” from “busy” when making changes to the event. So just make sure to double check before saving.
Once you have blocked time out on your calendar, head to the appointments tab > add event to ensure that those dates are no longer showing as available on your booking site.
In Captivated, head to the Appointments tab, select your calendar from the drop-down and then click on the “Settings” button.
To adjust your duration, you can do so under the Appointment Details tab:
You can adjust the hours you would like to accept Love-Encore Redelivery appointments under the availability tab.
Other settings available are:
Hover over the info icon to learn more about each item.
Under the Advanced tab, you can adjust your time slot intervals.
Click on the Search icon above your conversation list.
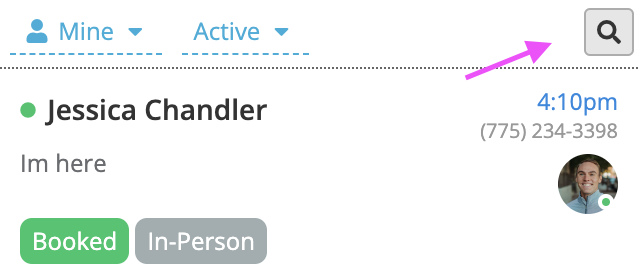
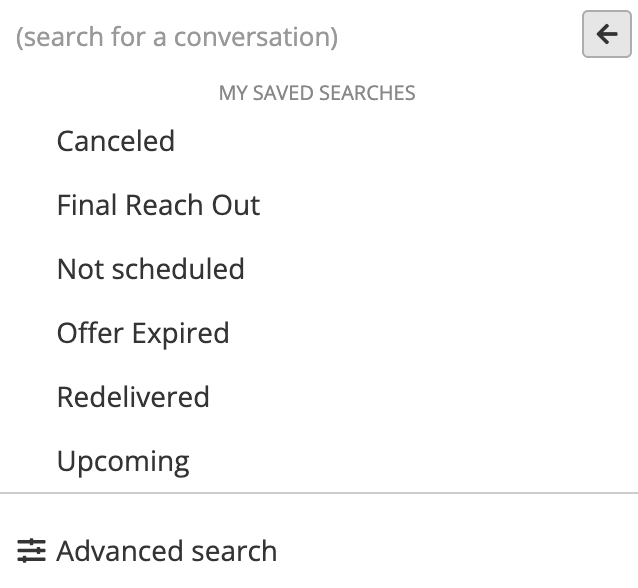
Choose “Upcoming” to filter and see all of your scheduled appointments within your conversation list. You can also filter to see all canceled appointments, Redelivered appointments, or conversations where the customer has not yet booked an appointment and more!
If you’re seeing a conversation, or multiple conversations without a status, it’s likely because you’re sending a template or message that’s not set up with automation.
When you see this, reach out to our Support team and we’ll make adjustments to your account to add automation to any custom templates you are using.